
If you live in Sacramento and are part of the USDA Zone 9b, you know that the Mediterranean climate offers a fantastic opportunity to grow a diverse range of plants throughout the year.
But with so many options, knowing what to plant and when can be challenging. Fret not, fellow green thumbs!
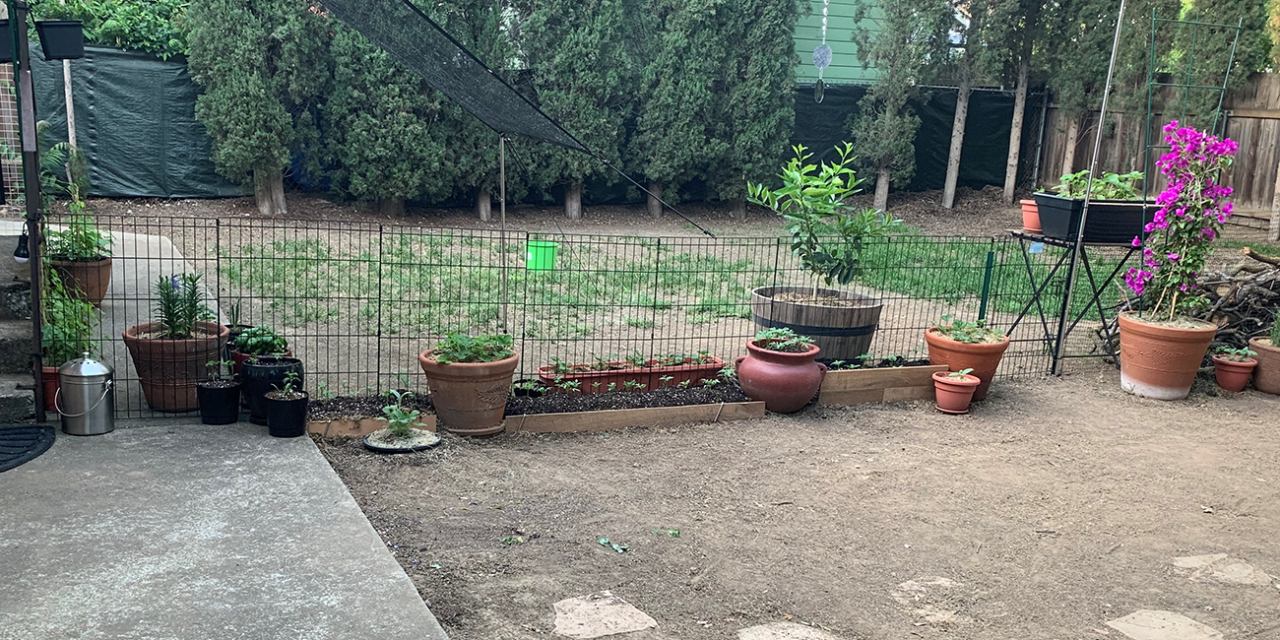
I’ve created a month-by-month guide to help you plan your Zone 9 Sacramento garden.
January — A Fresh Start
While the weather is superb and the ground may be damp, January is ideal for planting bare-root fruit trees, roses, and cool-season vegetables like lettuce, spinach, and kale.
You can also start seeds indoors for warm-season crops like tomatoes and peppers, giving them a head start for transplanting later in the season.
February — Embracing Spring
As temperatures rise, February is an excellent month to plant artichokes, asparagus, and strawberries.
Additionally, you can sow seeds for cool-season vegetables like peas, carrots, and beets directly into the ground. It’s also time to start seeds indoors for warm-season crops such as eggplants and melons.
March — Gearing Up for Warm Weather
March marks the beginning of the warm-season planting window.
Transplant your tomatoes, peppers, and eggplants, which started indoors earlier. Direct sow seeds for beans, corn, squash, and cucumbers. Remember about herbs like basil, oregano, and dill, which can also be planted in March.
April — Full Speed Ahead
The weather is typically warm in April to plant sweet potatoes and okra, and transplant melons start indoors.
Continue sowing seeds for warm-season crops like beans and cucumbers, staggering your planting dates to ensure a continuous harvest throughout the summer.
May — The Heat is On
As the temperatures rise, focus on heat-loving plants in May.
Plant pumpkin seeds; transplant melons started indoors if you haven’t already. It’s also an excellent time to plant flowering annuals like petunias, marigolds, and zinnias to add color to your garden.
June — Mid-Year Maintenance
June is a great time to plant tropical and subtropical fruit trees like citrus, avocado, and guava.
While you’re at it, add some heat-tolerant annuals like salvia, vinca, and sunflowers to your garden beds. Remember to monitor watering and pest control, as June’s warmth can lead to increased evaporation and insect activity.
July — Savor the Summer
In July, focus on planting heat-tolerant greens like Swiss chard and Malabar spinach.
You can also plant a second round of tomatoes, peppers, and eggplants for a late-summer harvest. Keep up with watering and pest control, and harvest your crops regularly to encourage continuous growth.
August — Preparing for Fall
As summer winds down, plant cool-season vegetables like broccoli, cauliflower, cabbage—and leafy greens like lettuce and spinach.
August is also the time to sow seeds for root vegetables like carrots, turnips, and radishes.
September — The Transition Month
Continue planting cool-season crops like peas, beets, and onions in September.
You can also plant garlic cloves and shallot bulbs for a harvest in the following spring. As temperatures cool, it’s time to remove any remaining warm-season crops and prepare the garden beds for fall and winter planting.
October — Settling in for Winter
October is an ideal time to plant cover crops like clover, vetch, and mustard, which help improve soil fertility and structure.
Also, grow cool-season vegetables like kale, collards, and Brussels sprouts. It’s also time to plant spring-flowering bulbs like daffodils, tulips, and hyacinths, ensuring a burst of color when spring rolls around again.
November — Cool-Weather Companions
As temperatures drop, focus on planting cool-weather crops like Swiss chard, spinach, and Asian greens.
November is also the perfect time to plant bare-root fruit trees like apples, pears, and plums and berry plants like raspberries and blackberries. Remember to mulch your garden beds to protect plants from frost and keep weeds at bay.
December — Winter Rest and Reflection
While December may be a quieter month in the garden, it’s still a great time to plant cool-season flowers like pansies, violas, and snapdragons.
As the year closes, take some time to reflect on your gardening successes and challenges and start planning for the following year’s garden.
Table of Contents
What if I miss a planting window?
It’s not the world’s end if you miss a planting window.
Some plants are more forgiving than others, and you may still have success if you plant them a bit later than recommended. However, be aware that planting too far outside the ideal window may result in reduced yields or plants that struggle to thrive.
In conclusion, Zone 9 Sacramento gardeners have an exciting variety of plants to grow throughout the year. Following this month-by-month guide, you can make the most of your garden and enjoy a continuous harvest of fresh produce and beautiful blooms.
So, what will you plant this month?
The Power of Citronella: A Mosquito-Free Haven in Sacramento’s Zone 9b
Before delving into the specifics of growing and caring for Citronella, let’s journey back in time to trace its roots.
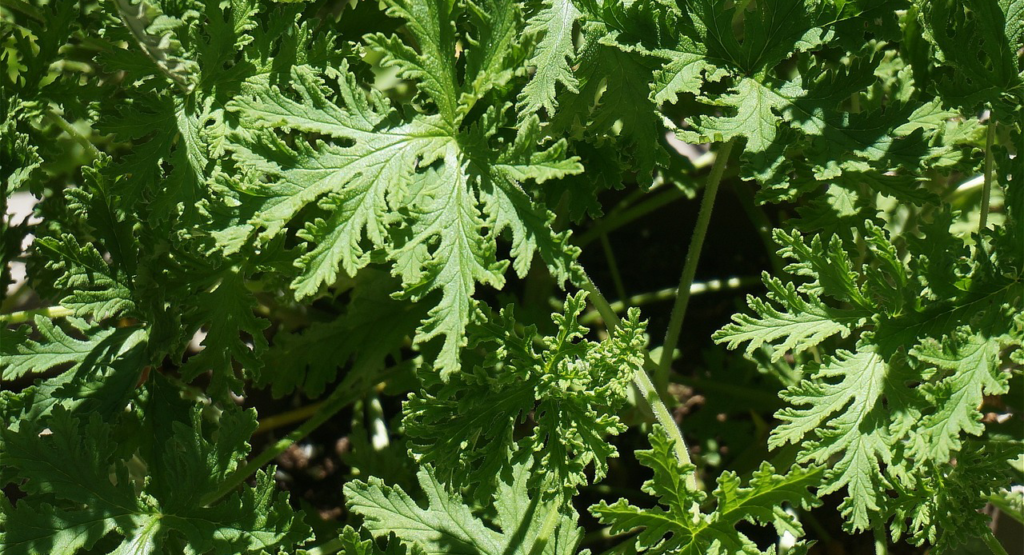
Citronella, officially known as Cymbopogon nardus or C. winterianus, is a perennial grass native to Asia. There, it’s been used for centuries in a myriad of applications—from culinary flavorings to medicinal purposes and, of course, for its natural mosquito-repellant properties. Fast-forward to the present day, and it’s gained popularity worldwide, especially for those seeking to enjoy our garden spaces without the uninvited, buzzing guests.
The Citronella plant plays a unique role in my garden, serving as a cherished companion and effective guard. Every day, as I water my green oasis, a simple misting of my large citronella plant envelops my porch in a captivating fragrance, providing an effective barrier against mosquitoes.
Optimal Placement: Home is Where the Sun Shines
One lesson I’ve learned from my Citronella journey?
These plants adore their sunbaths, and a sun-filled placement is essential for their robust growth. While my Citronella enjoys a spot on my back porch, you can keep it anywhere it will get at least six wonderful hours of direct sunlight.
The Sun and Citronella: Dancing in the Light
Don’t be fooled, though.
While Citronella is a sun-worshiper, it appreciates some kindness during the scorching Sacramento summer afternoons. My citronella retreats to a partially shaded spot when the temperature starts soaring.
Remember, everything in moderation, even the sun.
Soil and Watering Needs: It’s a Balancing Act
Citronella loves a good drink but also appreciates well-draining soil and a slightly acidic pH.
I ensure the soil maintains a pH between 6.5 and 7.0. As for watering, remember to keep the soil consistently moist without letting it turn waterlogged.
Daily Rituals: Misting, the Gateway to Fragrance
Each morning, I give my Citronella a gentle misting.
This simple act hydrates the leaves and releases the plant’s signature scent. However, remember that the mosquito-deterring effects seem most potent when the plant’s leaves are agitated. Rubbing a leaf on your skin or giving the plant a rough misting are perfect ways to unlock their full potential.
Pruning: A Path to Vigor and Strength
The Citronella plant, much like a well-groomed poodle, benefits from regular trims.
I often prune the gangly ends of leaves, encouraging my plant to grow thicker and more robust. This not only increases the aesthetic appeal but also promotes healthier growth.
Propagating Citronella: More Green, Less Mosquitoes
Propagation of the Citronella plant is as straightforward as it gets.
Cut a healthy stem, ensuring it has at least two nodes. Pop this cutting in a glass of water until roots begin to form, then plant in very well-draining soil. Soon enough, you’ll have another fragrant warrior against mosquitoes.
The Citronella Q&A Corner
Q: My Citronella plant’s leaves are turning yellow. What’s going wrong?
A: Overwatering or poor drainage could be the culprits. Ensure your plant has well-draining soil and adjust watering as necessary.
Q: Does Citronella plant work as a mosquito repellent when just left alone?
A: Possibly, but its efficacy improves significantly when the leaves are agitated. Give it a mist, or rub a leaf on your skin, to release the full power of its scent.
Q: Can Citronella plants survive indoors?
A: Absolutely, but they will need a spot with bright, indirect sunlight. And remember to maintain regular watering!
From Ancient History to Modern Triumph
From its ancient roots in Asia to my back porch in Sacramento, the Citronella plant’s journey is a testament to this aromatic grass’s timeless appeal and versatility.
Each day, as it releases its distinctive fragrance, I am reminded of its rich heritage and the global journey it undertook to arrive at my home.
My journey with the Citronella plant gave me a lush and fragrant addition to my porch and a reliable soldier against Sacramento’s notorious mosquito population. With the simple morning misting, my home becomes an aromatic fortress, safeguarding my peaceful garden moments.
So, what’s your plant story? What plant legacy are you growing in your garden? What lessons have you learned from these silent teachers, and how have they enriched your life? Remember, every leaf has a story to tell, every fragrance a tale of its journey.
Let this chronicle of Citronella serve as an inspiration for your gardening adventures. Remember that with sunlight, water, a little pruning, and much love, your porch can also be transformed into a thriving, mosquito-free haven, a personal paradise that speaks of your love for nature.
Embracing Fuschia Swingtime in Sacramento’s Zone 9b
My garden has always been my haven, but one plant had eluded me.
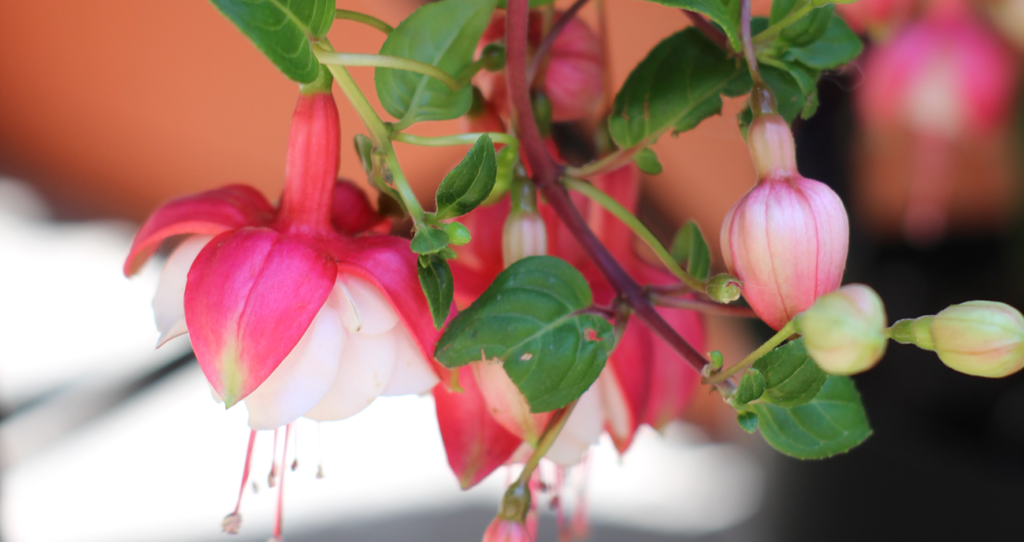
That is until I brought home the stunning Fuschia Swingtime.
After much searching, it was finally in my possession. The delicacy of its double blooms and the balance of white sepals, and red corolla was an enticing addition to my garden.
But, the early days could have been smoother sailing.
Initially, it struggled, grappling with flower and bud drop, which got me scratching my head. After investigating, I found the culprit: night-time temperatures dropping below 50 degrees. Our Sacramento Zone 9b winters seemed too cold for my tropical beauty.
Regulating Temperature: Don’t Let the Cold In
In response, I adapted.
Now, I keep my Fuschia Swingtime sheltered on colder nights. It’s a simple step, but it makes a world of difference. As the sun emerges, my plant basks in the early morning sun before Sacramento heats up.
Remember, they appreciate gentle morning light but scorching afternoon rays? Not so much.
Finding the Perfect Placement: Let there be (Morning) Light
Finding the perfect spot for a plant can feel like a game of Tetris, but it’s all part of the fun.
As the intense Sacramento heat sets in, I shield my Fuschia Swingtime under the west eave. The shade offers a cooling sanctuary during blistering afternoons. Additionally, I’ve decked the area out with 50% shade cloth to ensure my plant gets the optimum light it needs – bright but indirect.
Pruning: The Secret to Bushier Blooms
The tale takes a turn here: pruning.
With some careful snipping, my Fuschia Swingtime started to fill out beautifully. Trimming the ends promoted lateral growth, giving it a fuller, bushier appearance. And who doesn’t want a lush, vibrant plant adorning their garden?
Navigating Soil and Water Needs: It’s All About Balance
Just like us, plants need a good diet and plenty of hydration.
The Swingtime appreciates well-draining, fertile soil with a neutral to mildly acidic pH between 6.0-7.0. As for watering, these plants dislike being parched. So, keep the soil consistently moist, but remember – soggy soil is a big no-no.
Propagation: More Blooms, Please!
Propagation may sound daunting, but it’s easier than you think.
Late summer is the perfect time to start. Snip off 4-inch long tips, remove lower leaves, dip it in a good rooting hormone, and plant in a well-draining soil mix. With patience and care, you’ll be rewarded with new Fuschia Swingtime sprouts.
Wintering: A Delicate Dance
Wintering these tropical gems requires some forethought.
Fuschias are semi-evergreen and may lose some leaves in winter. Protect them from freezing temperatures. Consider moving them to a frost-free area or providing suitable insulation if necessary.
A Swingtime Q&A
Q: My Fuschia Swingtime is wilting in summer. What am I doing wrong?
A: Even in the heat, Fuschias need their hydration. Keep the soil moist, but avoid waterlogging. Also, remember that the plant prefers cooler, shaded areas during the hottest party of the day.
Q: Why are my Fuschia Swingtime’s leaves turning yellow?
A: Yellow leaves might signal overwatering, poor drainage, or a nutrient deficiency. Ensure your plant has well-draining soil and is receiving balanced fertilizer.
Q: Can Fuschia Swingtime grow indoors?
A: Yes, with the right conditions. Provide bright, indirect light and consistent humidity, and your Fuschia will thrive indoors.
Concluding Notes: A Blooming Triumph
From bud drop struggles to discovering the perfect spot under the west eave, my journey with the Fuschia Swingtime has been enlightening.
I’m thrilled to have overcome the challenges and enjoy the spectacular blooms in my Sacramento garden.
Having successfully navigated this horticultural adventure, I can’t help but wonder what plant will next capture my imagination.
What about you?
What gardening challenges have you faced and overcome in your quest for the perfect garden? And what plant is currently eluding your green thumb? Remember, sometimes the journey is just as beautiful as the bloom.
Take this post as a testament to the resilience of both plants and their carers. With patience, adaptability, and a sprinkle of love, every green endeavor can lead to a flourishing triumph.
Sun-Kissed Blossoms: Growing Hibiscus in Sacramento’s Zone 9b
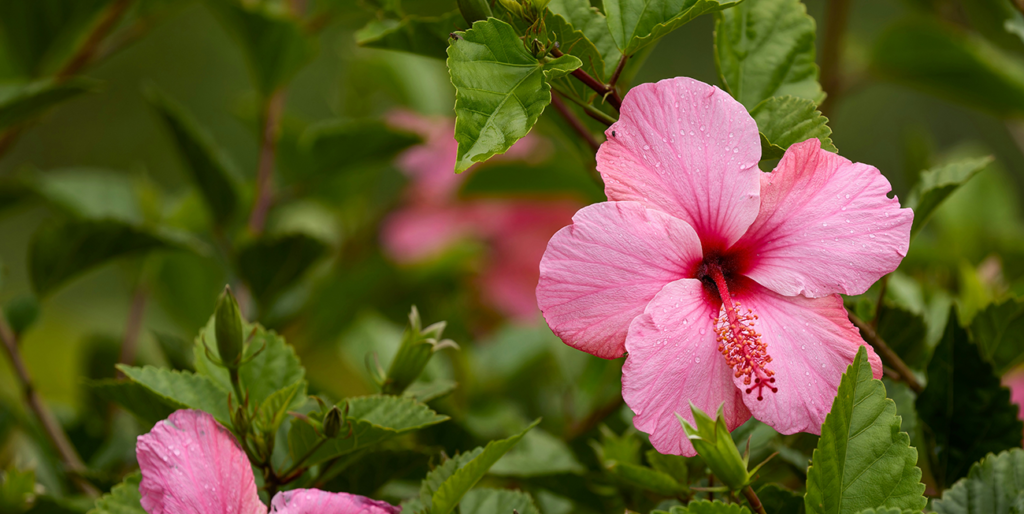
Since adopting my hibiscus in April, I’ve embarked on a horticultural journey that’s as vibrant as the blooms it produces.
Transported from my front porch to a sunnier location in my backyard, the plant has finally begun to thrive. When I see its exotic flowers, memories of family trips to Hawaii rush back. Today, I want to share the joy and knowledge that growing hibiscus in Sacramento’s Zone 9b has brought me.
The Charming Sun Worshiper
In the world of hibiscus, sunlight is king.
One week after shifting my hibiscus to a sunnier spot, it responded with a lively burst of blooms. Initially, the plant was positioned on the front porch, where shadows danced more than sunlight. Signs of low light, like dropping buds, prompted me to relocate it to the backyard. It now basks in the early morning sun, the perfect greeting for any new day.
In Sacramento’s Zone 9b, remember that hibiscus loves full sun.
Morning sunlight is particularly beneficial as it’s not as harsh, reducing the risk of leaf burn. Strive to provide your hibiscus with at least six hours of sunlight daily, and remember, more is always merrier!
The Thirsty Beauty
While the hibiscus revels in sunlight, it also requires adequate watering to flourish.
Hibiscus plants are thirsty creatures. Keeping the soil moist is key, but be cautious not to overwater – you don’t want to drown the roots.
In the sizzling summers of Zone 9b, the demand for water increases.
Daily watering might be necessary, especially if you notice the leaves wilting. However, always check the soil before watering. It should feel slightly dry when you touch, about an inch deep.
The Tender Offspring
One of the many wonders of hibiscus is its ease of propagation.
Consider taking cuttings to expand your garden with more of these tropical beauties. Choose a healthy, vigorous stem with several nodes and make a clean cut. Ensure the cutting is roughly 4-6 inches long, with leaves only on the top half.
After dipping the cut off end of your hibiscus into rooting hormone, plant it into a mixture of perlite and peat moss. The cutting will need a warm, bright, but not directly sunny location to take root, so keep it indoors near a window.
With some patience, new plants will be ready to grace your garden!
The Delicate pH Balancer
Hibiscus, like many plants, has specific soil requirements for optimal growth.
These tropical beauties prefer slightly acidic soil, with a pH of around 6 to 6.5.
In the clay soils common to Sacramento, adjusting the pH to make your hibiscus feel at home might be necessary. Use a simple soil test kit or a metal-rod pH measuring tool to determine the current pH. If adjustments are needed, adding sulfur or peat moss will help lower the pH to the desired range.
Q&A Corner: Why isn’t my Hibiscus Blooming?
A common question I hear from fellow gardeners is, “Why isn’t my hibiscus blooming?“
If you’re facing the same issue, don’t worry!
It could be due to several factors. Insufficient light is the most common culprit. Remember, hibiscus loves sunlight. Also, sometimes too much or too little water can stress the plant and hinder blooming. Additionally, regular feeding with a high-potassium fertilizer can encourage blooms. Be patient if you’ve followed these steps and still find your hibiscus stubborn.
It might just need more time to acclimate to its new home!
Conclusion: Embrace Your Green Thumb
The journey of growing hibiscus in Sacramento’s Zone 9b, with its abundant sunshine and unique soil conditions, has been a labor of love and a source of immense joy.
Whether you’ve been gardening for years or just discovered your green thumb, nurturing a hibiscus in your own backyard is an adventure worth undertaking.
Isn’t it marvelous how a single plant can stir up such rich memories, bring life to your garden, and provide an exciting learning journey? Perhaps you’ve already embarked on this journey, or maybe you’re just about to start. What cherished memories will your hibiscus bring to life?
As I watch the vibrant blooms sway gently in the warm breeze each morning, I’m reminded of the sun-soaked beaches of Hawaii. I’m sure that whenever your hibiscus blossoms, you’ll be transported to your own tropical paradise. Happy gardening, my friends! May your hibiscus flourish, your knowledge grow, and your memories blossom!
Remember, the journey is as beautiful as the blooms. Are you ready to embrace yours?
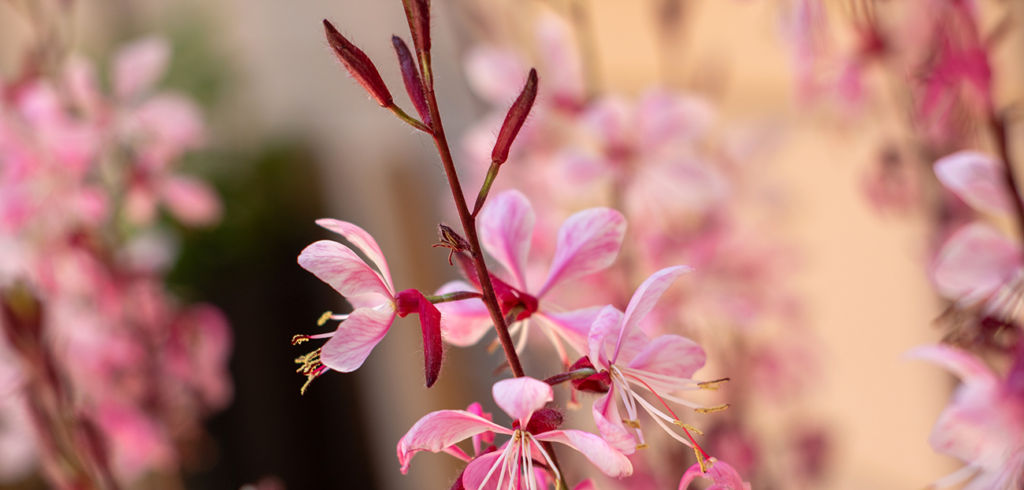
Cultivating Gaura Lindheimeri “Plum Pretty” in Sacramento Zone 9b
Hi fellow gardeners!
I’m super glad to take you along on my recent journey into the world of Gaura Lindheimeri “Plum Pretty,” an absolute gem now taking center stage in my home garden.
I’m obsessed with its light pink blooms and dramatic, tall stems.
And I’m eager to share my experiences, tips, and a few little tricks I’ve learned on how to grow and take great care of this little beauty in our Sacramento Zone 9b.
The History and Glory of Gaura Lindheimeri “Plum Pretty”
Before we delve into the how-to’s, let’s take a moment to appreciate the background of this incredible plant.
Native to Texas and Louisiana, Gaura Lindheimeri has a reputation for tenacity and elegance. The “Plum Pretty” variant, with its delightful pink flowers and burgundy foliage, adds a stunning pop of color and texture to our garden landscapes.
Let’s Talk Location: The Sun’s Role
As the old saying goes, location is pretty much everything, and it couldn’t be more accurate for our “Plum Pretty.”
Being native to the sunny southern United States, it thrives in full sun. It adores soaking in at least six hours of direct sunlight each day, but it’s also pretty adaptable, tolerating partial shade.
Quenching Thirst: Watering Needs
In terms of water needs, this plant is impressively drought-tolerant.
I water my “Plum Pretty” deeply but infrequently, which promotes robust root growth and resilience. Generally, a good drenching every 7-10 days during dry periods will keep it happy. But remember to let the top soil dry out between waterings to prevent overwatering.
Just Right: Balancing the pH
Gaura Lindheimeri “Plum Pretty” isn’t too picky regarding soil pH.
It can handle a broad range from slightly acidic to slightly alkaline. In my garden, I’ve found it thriving in a pH range of 6.0 to 7.5. Remember, a simple soil test can provide a valuable baseline for any soil amendments needed.
Spreading the Love: Propagation Tips
Propagation of “Plum Pretty” can be achieved through seeds, cuttings, or division.
I’ve had the most success with division. Dig up an established plant in early spring, gently divide the root ball into little smaller sections, and replant each section. It’s a great way to multiply the beauty of “Plum Pretty” in your garden or share it with friends!
Frequently Asked Questions
Let’s tackle some questions that often arise when growing and caring for Gaura Lindheimeri “Plum Pretty.”
Q: Is “Plum Pretty” deer resistant?
A: Yes! One of this plant’s greatest and most wonderful benefits is its deer resistance. It makes it a perfect addition to gardens that may need help with these garden visitors.
Q: When does “Plum Pretty” bloom?
A: You can expect the beautiful pink blooms of “Plum Pretty” from late spring until the first frost in fall. That’s a pretty extended show!
In conclusion, cultivating Gaura Lindheimeri “Plum Pretty” in Sacramento Zone 9b is delightful. It’s a resilient, stunning addition to any garden that offers an extended bloom season.
What’s your favorite aspect of the “Plum Pretty”?
Do you appreciate its tenacity, stunning pink blooms, or ability to add dramatic height to your gardenscape? How has your experience been cultivating this gem in your garden?
As we garden, we also grow. So don’t be discouraged if things don’t go perfectly. Remember, every plant has its own personality, and part of the great joy of gardening is learning how to coax each one to thrive uniquely.
Planting the Gaura Lindheimeri “Plum Pretty” is like adding a little magic touch to your garden. And with the knowledge you’ve gained from this post, you are now well-equipped to embrace this journey. Let’s cultivate the beauty that nature has to offer and, in doing so, create our own little paradises right here in Sacramento.
Leap, give “Plum Pretty” a try.
It may become your new favorite garden gem.
This luxurious plant will reward you with its charming blooms and showy stems, bringing joy and wonder to your gardening journey.
Until next time, happy gardening.
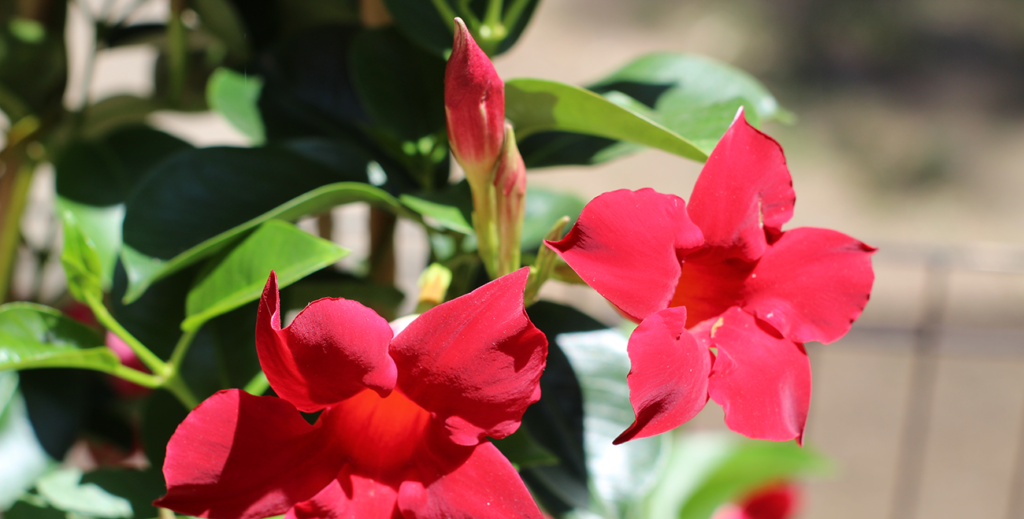
Growing Sun Parasol Crimson Mandevilla in Sacramento’s Zone 9b
As I savor the very first sip of my coffee every morning, I’m greeted by a cascade of vibrant crimson blooms.
My sun parasol crimson mandevilla, a captivating spectacle reaching three feet tall, sits basking in the morning sunlight, visible from my kitchen window. Its radiant allure is irresistible, compelling me to share my insights and experiences on growing this beautiful vine in Sacramento’s Zone 9b.
A Step Way Back in Time: The Story of Mandevilla
Before we delve into the art of cultivation, let’s journey through time.
Named after Henry Mandeville, a 19th-century British diplomat and gardener, the Mandevilla has roots in South and Central America. It flourishes in forest habitats, elegantly entwining itself around trees and shrubs.
Once brought to European and North American shores, this tropical beauty quickly became a beloved houseplant. Its ability to bloom profusely, even in a pot, endeared it to gardeners. It’s an ornament for our homes and gardens and has also been used at times in traditional medicine in its native regions.
However, in the constant and capturing hustle and bustle of our current and modern lives, we often overlook its past. Now, as I gaze at my mandevilla, I am reminded of its journey from the tropical rainforests to my Sacramento home. And just like that, history intertwines with horticulture.
The Light of Life: Illuminating Your Mandevilla
As the sun starts to send its rays over the horizon, the first rays strike the leaves of my mandevilla, heralding the start of a new day.
Lighting is essential to this tropical charmer. Bright, indirect light brings out its best. Too much direct sun may cause leaf scorch, so remember, your mandevilla is adaptable and appreciates a bit of shade in the hot, hot heat of the day.
Striking a Balance: The pH Factor
A harmonious existence, it seems, is not just for us humans.
The soil pH greatly influences your mandevilla’s health. Slightly acidic soil, within a pH range of 6.0 to 7.5, is its preferred home. If your soil falls outside this range, fear not! To reach the optimal balance, you can amend it with things like sulfur or lime.
In this dance of alkaline and acidity, you are the choreographer.
Quenching Thirst: The Watering Regime
Basking in the dry Sacramento heat, watering is paramount.
I have found consistency to be crucial. I water my Mandevilla deeply once a week, adjusting in summer when the heat rises. Let the top one inch of soil completely dry between watering sessions. Too much love, in this case, is detrimental. Root rot, the bane of the Mandevilla, lurks where overwatering occurs.
Location, Location, Location: Choosing the Right Spot
The placement of your Mandevilla impacts its growth.
Mine graces a pot by my kitchen window, an ideal spot that provides enough light and room for its trailing growth. If your mandevilla is hanging, ensure it has the space to unfurl its cascading splendor.
The Joy of Multiplication: Propagation
Propagation is one of the most rewarding aspects of growing mandevilla.
I use stem cuttings. A sharp, clean cut just below a leaf node, a dip in rooting hormone (optional), and into well-draining soil it goes. In a few weeks, you’ll see a new plant emerging, a fresh dash of nature’s creativity. It’s like you’re witnessing a miracle, the birth of a new living being.
Question & Answer Corner
To enrich our dialogue, let’s tackle a common question:
“Why isn’t my Mandevilla blooming despite its healthy appearance?”
The usual culprits are insufficient light or improper fertilizer. To encourage blooms, experiment by placing your mandevilla in a brighter spot or try a high-phosphorus fertilizer.
Blooming Alongside History
Every petal of my Mandevilla tells a tale, intertwining the personal with the historical.
In my Sacramento home, a part of the world blossoms, carrying a story from tropical rainforests to my kitchen window. As I tend to my sun parasol crimson mandevilla, I remember that it’s not just about the stunning blossoms but also about preserving a piece of natural history.
Are you ready to embark on this vibrant journey of growing mandevilla in Sacramento’s Zone 9b? Or perhaps you’re already on this path? How does your experience align with mine? What gems of wisdom have you unearthed in your gardening journey?
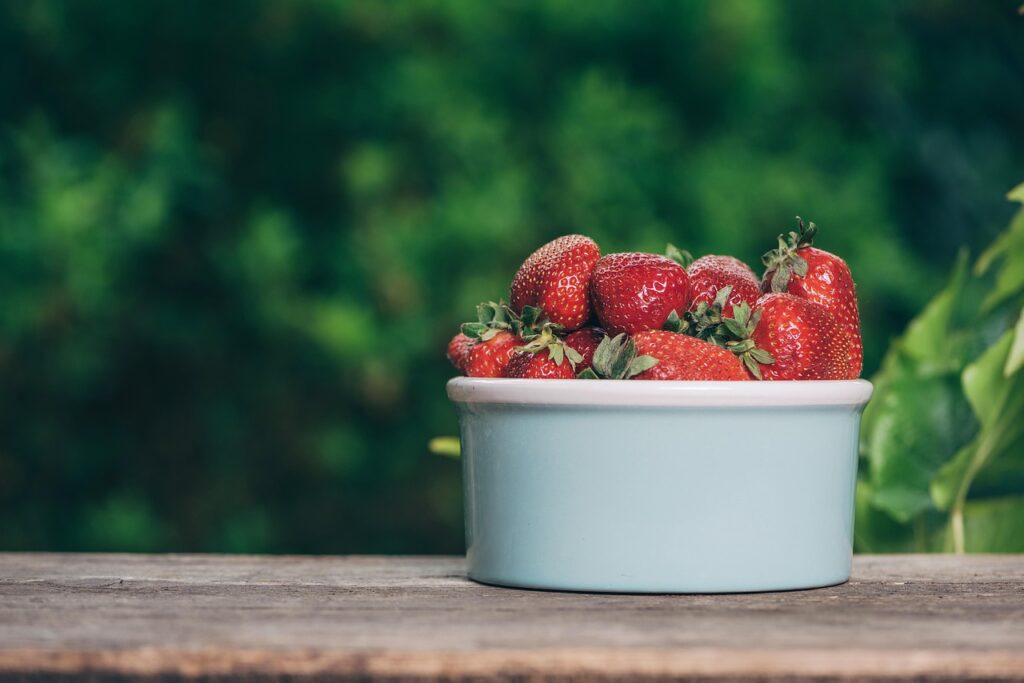
Cultivating Everbearing Strawberries in Sacramento’s Zone 9b
With a herb garden flourishing under my care, it was time to embrace a sweeter challenge.
The object of my fruity affection? The everbearing strawberry. Known for their continuous yield, these plump beauties have found a new home amidst my garden greens. Who can resist the amazing allure of a fresh, juicy strawberry any day of the year?
About Everbearing Strawberries
Unlike their June-bearing counterparts, everbearing strawberries offer two to three harvests each year: one in spring, another in summer, and occasionally a third in early fall.
This trait makes them a favorite among strawberry enthusiasts like myself, who crave the sweet-tart flavor throughout the year.
Sunny Spot – Your Strawberries’ New Home
Let’s get to the root of it: location matters.
Everbearing strawberries love full sun exposure. A spot graced with at least six hours of sunlight is ideal. This sun-loving nature ensures a bountiful harvest of delicious, sun-kissed berries.
Watering Wisdom: Just Right is the Key
Strawberries are thirsty but not too thirsty.
They love a good, deep watering but loathe water-logged soil. I recommend watering them once a week. Always keep an eye on the weather, though. A week with heavy rainfall means skipping the watering session. In contrast, extra hot and dry conditions call for more frequent watering.
Propagation: More Berries, Please!
The beauty of everbearing strawberries is that they propagate themselves.
Runners, or ‘daughter plants,’ spring from the ‘mother plant’ and take root nearby. To encourage this:
- Keep the soil around your strawberry plants loose and weed-free.
- Once a runner has taken root and developed a set of leaves, you can cut it from the mother plant.
- If you want to control where your strawberries spread, move the new plant to a preferred location before it takes root.
Berry Time: Harvesting Tips
The joy of everbearing strawberries is the recurrent harvests.
You can expect your first berries in spring, followed by a summer crop, and if you’re lucky, a third in early fall.
The trick to harvesting is waiting for the perfect ripeness. Your berries should be a uniform, bright red. Once they reach this stage, pluck them gently from the stem. If they resist, give them another day or two.
Keeping the Cycle Going
Consistent harvesting encourages more fruit production.
Don’t be shy about picking your ripe strawberries. They provide a tasty treat and stimulate your plants to produce more.
Are You Ready to Berry?
As we round off our berry adventure, I hope you’re excited about the prospect of growing your own everbearing strawberries.
The joy of tending these plants and the reward of a fresh, sweet harvest is a gardening experience like no other.
A Berry Happy Ending
There we have it, folks!
From choosing the perfect spot, watering with wisdom, and propagating with ease, to harvesting a basket full of juicy berries, we’ve explored the wonderful world of growing everbearing strawberries in Sacramento’s Zone 9b.
Every day brings a new opportunity to bite into a plump, juicy strawberry fresh off the vine. It’s a simple pleasure that sparks joy in the heart of every garden enthusiast.
As we welcome these new fruity friends into our gardens, let’s ask ourselves: What other delights can we coax from our backyard patch? How else can we turn our garden into a bountiful feast?
Remember, the world of gardening is full of wonders, and the journey is just as rewarding as the destination. Here’s to many fruitful harvests ahead!
Q&A Corner
Can I grow everbearing strawberries in pots?
Yes, indeed!
Everbearing strawberries adapt well to container gardening. Just ensure the pot is deep enough for the roots to grow and has good drainage. This allows you to control the growing conditions more precisely and even bring your strawberries indoors when the weather gets too harsh.
How can I protect my strawberries from birds and other critters?
Great question!
Birds love strawberries basically as much as we do. Consider using bird netting or a garden fabric to protect your harvest. These can be easily draped over the plants without damaging them.
I’m a strawberry lover and want to eat a few every day. Can everbearing strawberries make this dream come true?
Absolutely!
True to their name, everbearing strawberries yield fruit several times a year, allowing you to enjoy a continuous harvest. With proper care, you could have fresh strawberries at your fingertips for most of the year.
So there you have it!
This will help inspire you to jump into the rewarding endeavor of growing your own everbearing strawberries. Can you already taste the sweet success? I know I can.
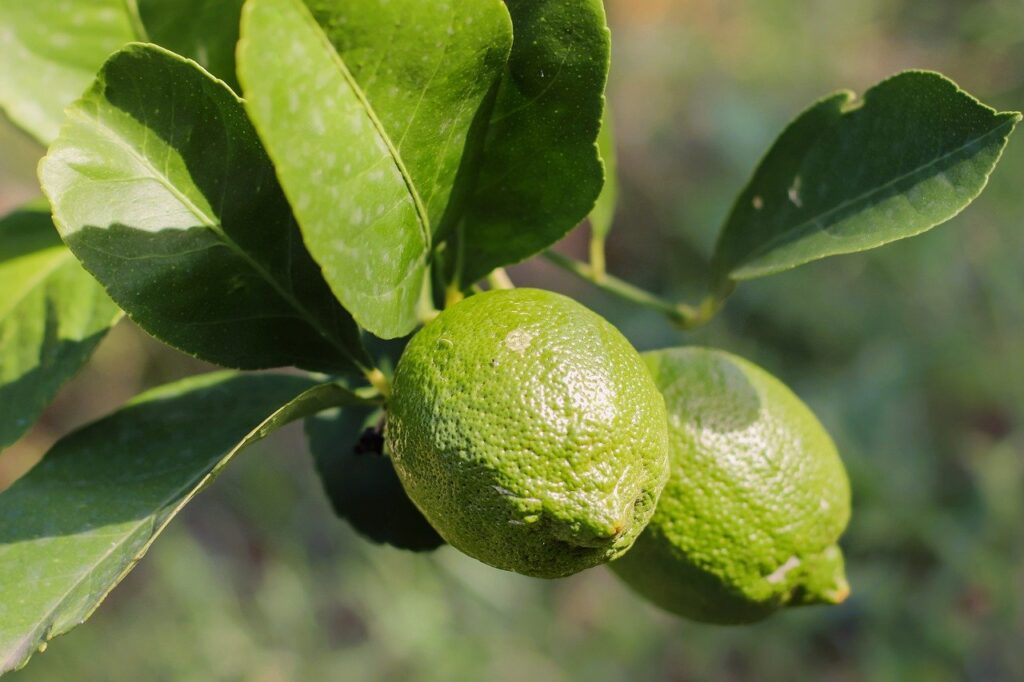
Growing and Harvesting Mexican Lime in Sacramento’s Zone 9b
Stepping into the world of homegrown fruits, I recently expanded my horticultural horizons beyond herbs.
My new venture? The zesty, vibrant Mexican Lime. Resting alongside a smattering of strawberries in my yard, this lime bush represents my first foray into fruit cultivation.
Why the Mexican Lime?
Also known as the Key Lime, this citrus star boasts a unique flavor profile, marked by a tart punch and aromatic undertones.
Smaller and seedier than their Persian cousins, these limes offer an unmatched zest to any culinary endeavor. More than just a kitchen companion, the Mexican Lime is a versatile, hardy bush well-suited to Sacramento’s Zone 9b climate.
Prime Location – The Sweet Spot
First things first, let’s talk about positioning.
Mexican Lime trees thrive in full sun, so choose a sunny area perfect for your plant that gets a very minimum of six hours of complete and direct sunlight each day. A south-facing location generally ticks this box.
While they can handle a little bit of shade, remember: more sun equals more fruit.
Watering Wisdom – Hydrate, Don’t Drown
When it comes to watering your lime plant, consistency is key.
Mexican Limes prefer well-drained soil and do not take kindly to water-logged roots. Aim for deep watering once a week, adjusting as needed for rainfall or particularly dry spells.
Watch your tree’s leaves for clues. If they begin to yellow or curl, they might require more hydration. However, sometimes leaves can turn yellow due to overwatering, too. It’s a tricky situation.
Propagation – Doubling the Zest
The magic of the Mexican Lime doesn’t stop at its fruit.
This resilient bush can be propagated from cuttings. Follow these steps for the best results:
- Cut a 6-inch stem from an established lime tree. Ideally, one just finished fruiting.
- Remove all but the top few leaves.
- Dip the cut off end of the stem in a rooting hormone; I’ve found success with organic rooting hormone alternatives like cinnamon and honey.
- Plant the cutting in a little pot or plastic cup filled with well-draining soil.
- Water it thoroughly, then cover it with a plastic bag to create a mini greenhouse.
- Place in a bright, warm area and keep the soil moist.
In a few weeks, you’ll see new growth, signaling that your lime cutting has rooted successfully.
Harvest Time – Reaping the Tasty Fruits of Your Labor
Harvesting Mexican Limes can feel like an ongoing treasure hunt.
These trees produce fruit sporadically throughout the year but typically peak in late summer and fall.
The key to harvesting is timing. Wait for the fruit to lighten from dark green to a lighter, yellowish-green. This color change indicates that your limes are at their peak of tartness and juiciness.
Twist the lime gently from the stem. If it resists, it’s not quite ready.
Keep the Cycle Going
Remember, the more you harvest, the more your tree will produce.
Be bold about picking your fruit regularly. This encourages continued flowering and fruiting, keeping your Mexican Lime tree in a productive cycle.
Ready to Lime?
As we wrap up our lime-growing journey, I hope the seeds of inspiration have been firmly planted.
With its robust nature and versatile fruit, the Mexican Lime is a fantastic addition to any Sacramento garden.
Are you ready to turn your green thumb to the world of citrus? What could be better than slicing into a fresh lime you’ve grown and harvested yourself?
Q&A Corner
I also bought a Mexican Lime bush from Home Depot. Any specific advice?
Absolutely! These trees are usually quite healthy and ready to grow.
Give your new lime bush a well-lit, sunny spot in your garden, and ensure it has well-draining soil. Keep up with consistent watering, but avoid overwatering. Monitor its growth, and if you spot any issues, don’t hesitate to consult with their garden center or a local nursery.
I live in a colder climate. Can I still grow a Mexican Lime tree?
Indeed, you can. Mexican Lime trees can be grown in pots and brought indoors during colder months. They make lovely houseplants and will still produce fruit with enough light.
The Lime of Your Life
There you have it, fellow garden enthusiasts!
An overview of taking care of your own Mexican Limes in Sacramento’s Zone 9b. We’ve covered everything from choosing the perfect sun-soaked spot, watering wisely, and propagating with precision to reaping a bountiful harvest.
The journey from the leafy branches of a lime bush to the zesty tang of a freshly sliced lime is a rewarding adventure. One filled with challenges, surprises, and the satisfaction of biting into the fruit of your labor.
What new plant friend shall we invite into our gardens next? What new flavors and experiences await us in our backyards?
Growing and Harvesting Rosemary in Sacramento’s Zone 9b Year-Round
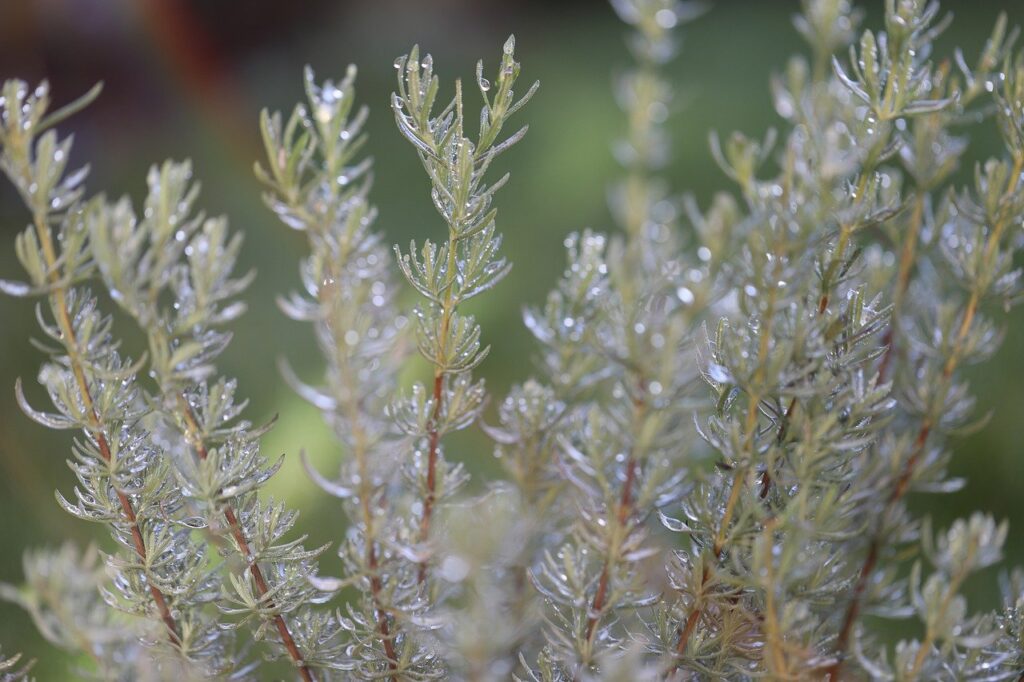
In my quest to grow a diverse herb garden, I’ve fallen in love with rosemary.
It’s a versatile and aromatic herb that adds a unique flavor to various dishes, especially when I’m cooking beef. Join me on this horticultural journey as I share my experience and tips on growing and harvesting rosemary in Sacramento’s Zone 9b year-round.
Meet the Aromatic Star: Rosemary
Before diving into planting and caring for your rosemary, it’s good to understand its characteristics.
Rosemary (Rosmarinus officinalis) is an evergreen perennial herb native to the Mediterranean region. It’s known for its fragrant, needle-like leaves and small, blue-purple flowers. Rosemary is a culinary delight and offers medicinal and ornamental benefits. Its oil has been used for centuries in traditional medicine to improve memory, alleviate muscle pain, and soothe digestive issues.
Selecting the Ideal Spot in Your Garden
To set the stage for your rosemary’s success, consider the following things when trying to choose the perfect location in your garden:
- Sunlight: Rosemary loves sunlight! Ensure your chosen spot receives at least 6-8 hours of direct sunlight daily.
- Soil: Well-draining, sandy soil with a pH between 6 and 7 is ideal for rosemary. Avoid heavy, clay-like soils that retain water, which may lead to root rot.
- Spacing: Give your rosemary ample room to grow. Space your plants about 2-3 feet apart to ensure proper air circulation and avoid overcrowding.
Watering and Nurturing Your Rosemary
Once your rosemary is planted, follow these guidelines to keep it healthy and thriving:
- Watering: Rosemary prefers slightly dry conditions, so be cautious not to over-water. Allow the top inch of the rosemary soil to dry out before watering. In Zone 9b, water your rosemary deeply every 1-2 weeks during dry periods.
- Fertilizing: Rosemary doesn’t require much fertilization. Apply a light, slow-release fertilizer in the spring and don’t over-fertilize, which can bring about excessive growth and reduced flavor.
- Pruning: Regularly trim and shape your rosemary to encourage bushy growth. Remove any of the dead or damaged branches you see to maintain its overall health.
Propagating Your Rosemary
To expand your rosemary collection or share the joy with friends, follow these simple steps to propagate your plant:
- Choose a healthy, non-flowering stem and cut a 4-6 inch piece at a 45-degree angle.
- Remove the lower leaves, leaving only the top few pairs.
- Dip the cut end in a good rooting hormone (optional) to promote faster root development.
- Plant the cutting in well-draining soil, water it thoroughly, and place your new rosemary cutting in a bright location.
- Keep the soil moist, but don’t keep it soggy, and in about 4-6 weeks, your cutting should begin to develop roots and be ready for transplanting.
Harvesting Your Rosemary for Delicious Dishes
To enjoy your rosemary’s flavors in your culinary masterpieces, follow these harvesting tips:
- Harvest your rosemary in the morning, after the dew has dried, but before the sun gets too hot.
- Use sharp scissors to cut the stems, and don’t remove more than about one-third of the plant at a time.
- Always cut from the top to encourage bushier growth.
- Once harvested, you can use your rosemary fresh or dry for longer storage.
Common Questions About Growing Rosemary in Zone 9b
As we near the end of our herbaceous journey, let’s tackle some common questions about growing rosemary in Sacramento’s Zone 9b.
Can rosemary survive Sacramento’s hot summers?
Yes, indeed! Rosemary thrives in hot, dry climates similar to its native Mediterranean region. However, water your rosemary regularly during exceptionally hot periods to prevent it from drying out.
Does rosemary attract pests?
Rosemary is relatively pest-resistant. However, it can occasionally attract aphids and spider mites. Regular inspections and natural pesticides can help keep these pests at bay.
Can I grow rosemary indoors during winter?
Absolutely! Rosemary can be grown indoors during winter, provided it receives plenty of sunlight and the room isn’t overly humid.
Green Thumb Meets Gourmet Cooking
Growing and harvesting rosemary in Sacramento’s Zone 9b is not just about the joy of gardening—it’s about bringing an extra dash of flavor and freshness to your kitchen.
The journey from planting to propagation and, finally, harvesting is indeed a rewarding experience.
I hope my horticultural voyage has inspired you to grow your own rosemary. But more importantly, I hope you’re excited to taste the difference that freshly harvested rosemary can make in your cooking, particularly those savory beef dishes!
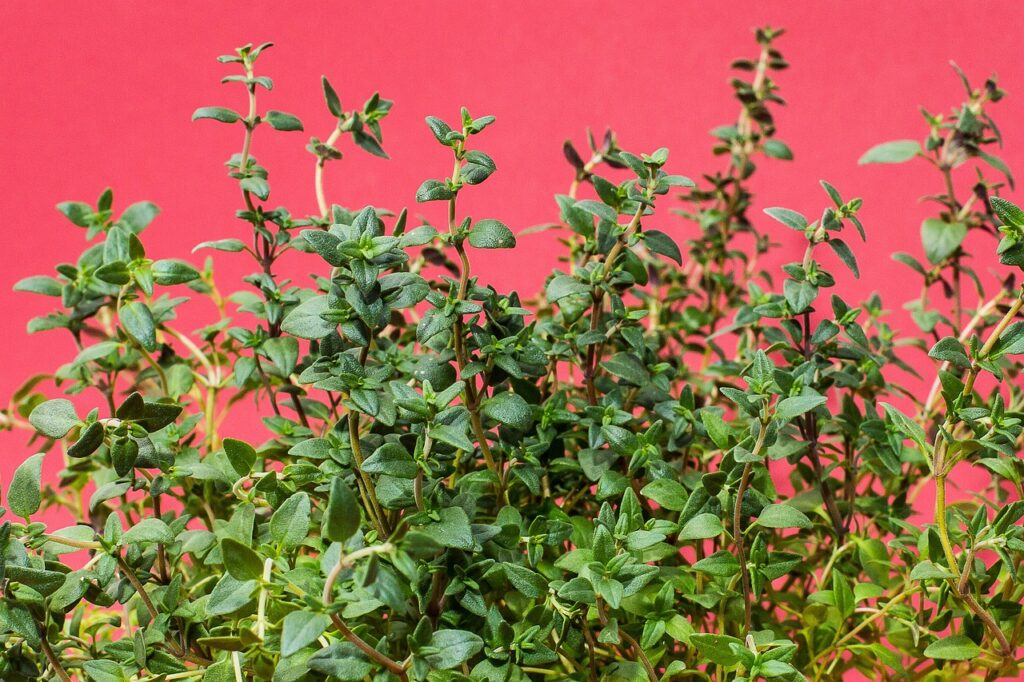
Cultivating Thyme Year-round in Sacramento’s Zone 9b
Since starting my herb garden, I’ve had the privilege of nurturing a variety of herbs.
But out of them all, thyme has captured my heart. Its rich aroma and subtle flavor make it my go-to spice, enhancing everything from roasted chicken to hearty stews. This post shares my top tips on how to grow and harvest thyme in Sacramento’s Zone 9b all year round.
So, get ready for a thyme-full of insights!
How to Get Thyme On Your Side: Planting Essentials
Thyme, Thymus vulgaris, is a versatile, hardy herb with more than fifty known varieties.
A Mediterranean native, thyme thrives in full sun and well-drained soil, making Sacramento’s Zone 9b an excellent habitat.
When choosing a location for your thyme, look for a location that is getting at least six hours of sunlight daily. The plant likes to have a pH between 6 and 8, so consider testing your soil before planting. If needed, amend the soil with lime to get the pH to rise or sulfur to lower it.
Watering Wisdom: Hydration Needs
Unlike some plants, thyme doesn’t require constant watering.
Ensure the soil doesn’t remain waterlogged, as this can cause root rot. Once established in our Zone 9b, thyme can typically survive with natural rainfall and occasional supplemental watering during dry periods.
Propagation Station: Spreading the Thyme
Thyme is easily propagated through seeds, cuttings, or division.
For seeds, sow them directly into the soil and expect germination within two weeks.
If you’re using cuttings, select a healthy stem and cut about 2-3 inches off, removing the leaves from the bottom half. Put the cutting into a simple glass of water, changing the water every two days. Once roots appear, plant your new thyme in a pot or the garden.
Division, on the other hand, involves splitting an established plant into two or more sections. This method is best performed in the spring or fall.
Harvesting Hints: Reaping Your Thyme Rewards
The beauty of thyme is its year-round harvest potential.
The very best time to do your harvest is right before the plant starts to flowers when the flavors are most potent. Use garden shears to cut off the top third of the plant, ensuring to leave the woody base intact. Regular harvesting encourages the plant to branch out and continue growing.
Caring for Your Thyme: Ensuring Longevity
Prune your thyme plant in early spring to promote new growth and maintain a nice and cute little compact shape.
In Zone 9b, thyme is perennial, so it will return year after year if properly cared for. Provide some good protection during extreme weather conditions to ensure your thyme thrives.
Why isn’t my thyme thriving?
A common issue some gardeners face is their thyme becoming woody or leggy.
This is usually going to be because there’s a need for more pruning or harvesting. Regular harvesting keeps your thyme plant healthy and promotes new growth.
So, there you have it!
My thyme-tested tips for growing and harvesting this delightful herb year-round in Sacramento’s Zone 9b.
Isn’t it incredible how a tiny herb can add such a punch of flavor and fragrance to our culinary creations?
Have you tried growing thyme before? What are your favorite dishes to sprinkle it on?
Cultivating and Reaping the Rewards of Sage in Sacramento’s Zone 9b
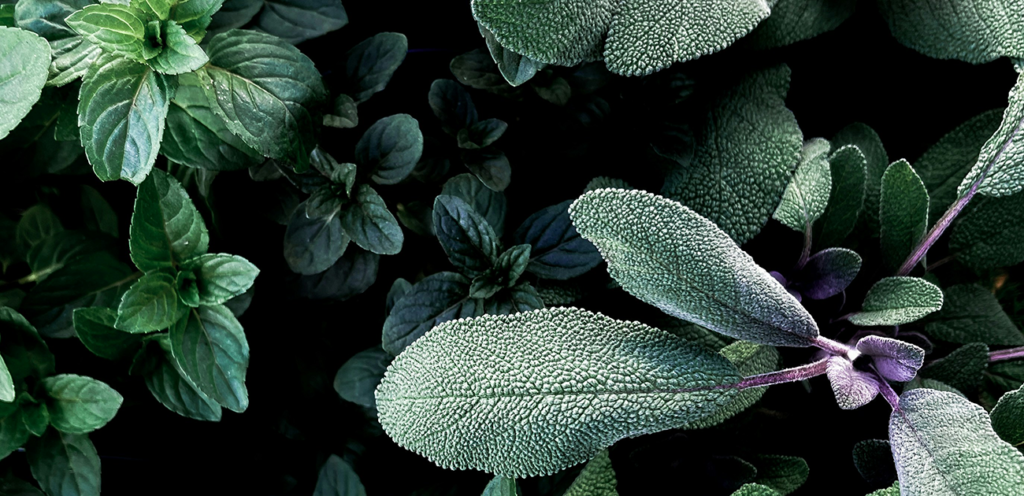
Today, we’re diving deep into one of my favorite culinary and medicinal herbs – Sage.
I’ve found it a wonderfully versatile addition to my little green paradise. Besides its culinary uses, did you know you can even create your own sage bundles for cleansing your living spaces?
Getting to Know Sage
Sage, or Salvia officinalis, is a healthy and hardy perennial that’s easy to grow and offers an incredibly aromatic experience.
It has silvery-green leaves and delicate purple flowers that add beauty to any garden. When rubbed between your fingers, the leaves release a captivating scent that’s relaxing and invigorating.
Choosing the Perfect Spot for Sage
Sage loves the sun.
In our Sacramento Zone 9b, you’ll want to pick a nice spot that gives your sage plant at least six to eight hours of direct sunlight daily. However, sage is also somewhat tolerant of partial shade, particularly in hotter afternoons.
As for soil, sage prefers well-draining ground. A slightly sandy or gravelly soil works best. Add some organic compost or sand to improve drainage if your garden is prone to having heavy clay soil.
Quenching Sage’s Thirst
While sage is drought-tolerant once established, it does need a regular watering schedule during its first growing season.
A good rule to follow in your garden is to give your sage plants a deep watering once a week. However, be sure not to overwater, as sage doesn’t like to have “wet feet.”
Keeping Your Sage Happy and Healthy
Sage isn’t a heavy feeder, but a little and light application of a balanced organic fertilizer that you give it in the spring can boost your plants.
To keep your sage bushy and productive, prune it back in the early spring before the new growth starts, removing about one-third of the plant. This will encourage bushier development and more leaf production.
Harvesting Sage: A Savory Reward
Harvesting sage is a simple and enjoyable process.
You can being your sage harvesting of leaves when the plant is large enough to spare a few. Pick leaves in the morning after the dew has started to dry for the best flavor. To make your sage bundles for smudging, tie a few stems together and hang them in a warm, dry place.
Propagating Sage: More of a Good Thing
One of the great things about sage is that it’s easy to propagate.
You can start new plants from seeds, cuttings, or by division. I prefer taking cuttings because it’s quick, and I can see some great results in just a few weeks.
Endless Possibilities: Sage in Your Life
Sage possibilities are endless from seasoning your favorite poultry dishes to creating a calming atmosphere in your home.
Not to mention the great and immense satisfaction you get from growing your own herbs.
As I continue my journey in herb gardening, I’m constantly finding new ways to use these aromatic gifts of nature. Now, how will you use your sage? Are there other herbs you’re curious about?
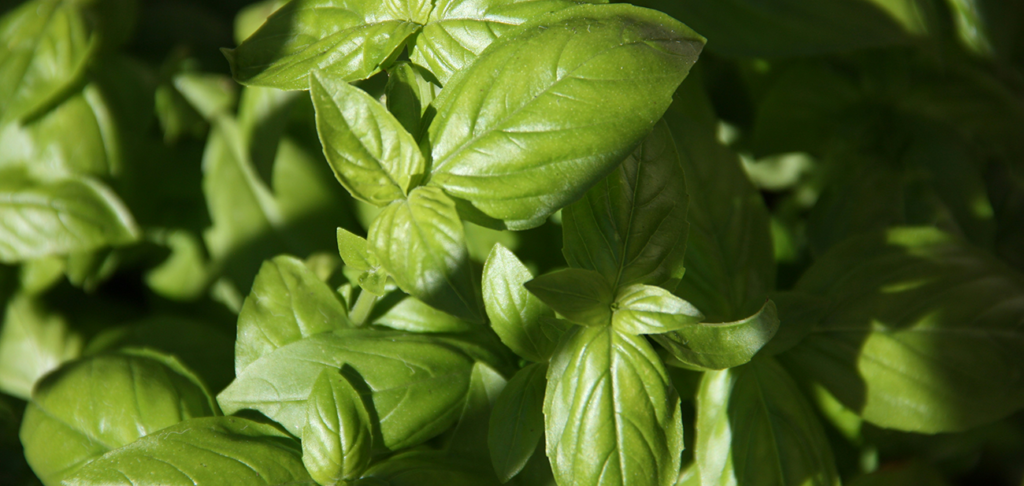
Growing Basil in Sacramento’s Zone 9b
Welcome back, my fellow green thumbs!
Today, we’re shifting our focus to an absolute superstar of the herb world, Sweet Basil. As an ardent fan of fresh, vibrant flavors, I can’t even begin to describe to you how much I absolutely adore this versatile herb. If you, like me, dream of fresh Caprese salads adorned with just-picked basil leaves, you’re in for a treat. Let’s dive right into this aromatic journey!
“Planting Your Basil: Choosing the Right Spot”
When starting your basil journey, location matters.
Basil loves the sun, so find a spot in your garden where it will get 6-8 hours of sunlight daily. Moreover, ensure your chosen location has well-draining soil. Basil isn’t a fan of soggy roots!
Consider companion planting. Tomatoes are an excellent partner for basil, not just in the kitchen but in the garden too. The two plants benefit each other, enhancing growth and flavor. Talk about a perfect pair!
“Quenching Basil’s Thirst: Watering Essentials”
Basil has a healthy thirst, especially during hot summer days.
However, it prefers soil that’s moist, not drenched. A good and basic rule of thumb you can follow is to water basil once every 1-2 days, but that’s depending on the weather and soil conditions.
To avoid mildew, water your basil at the base of the plant. Keeping those lush leaves dry helps maintain a healthy, productive plant.
“Basil Maintenance: Pruning and Propagation”
Pruning is a must to ensure your basil plant stays bushy and productive.
Regularly start pinching off the top sets of little leaves often once your plant is at about six inches tall. This simple step promotes branching.
Propagation is a breeze with basil. To keep your basil supply steady, take a four-inch stem cutting, remove the lower leaves, and place it in a glass of water. In a couple of weeks, you’ll see roots forming.
At this point, your new basil plant is ready to hit the soil.
“Harvest Time: Plucking Those Fragrant Leaves”
Harvesting basil is a joy.
The leaves are most aromatic just before the plant flowers, making this the perfect time to pluck them. Be gentle when harvesting. Snip off the leaves with scissors, ensuring you don’t damage the stems.
“Savoring the Harvest: Culinary Delights with Basil”
Now for the best part—enjoying the fruits, or rather leaves, of your labor. Freshly harvested basil is incredibly versatile. Here’s how I love to use mine:
- Caprese Salad: Fresh basil leaves, ripe tomatoes, and mozzarella drizzled with balsamic reduction—need I say more?
- Basil Pesto: A classic favorite, basil pesto is delightful on pasta, bruschetta, or grilled chicken.
- Basil Infused Oil: This aromatic oil elevates any dish it graces.
“Bountiful Basil: A Joy to Grow and Savor”
Growing sweet basil in your backyard is a rewarding experience that pays off in spades.
From choosing the best perfect spot in your garden and giving the right amount of water to pruning and harvesting, each step brings you closer to the sublime moment of savoring your homegrown basil.
As we wrap up this aromatic journey, let’s answer one more question:
Q: I’ve noticed some black spots on my basil leaves. What could be the problem?
A: Black spots on basil leaves could indicate a fungal infection. Try reducing the watering frequency and ensure the leaves aren’t getting wet when you water the plant. Additionally, you can use a fungicide spray on the affected areas to control and stop the spread of the infection. Ensure adequate spacing between your plants to improve air circulation, which can help prevent future fungal problems.
Grow Your Basil
Now that you are finally equipped with all the basic knowledge you need to cultivate a bountiful basil bonanza in Sacramento’s Zone 9b, I encourage you to give it a go ahead and get your hands dirty and try it.
The rewards of growing your sweet basil are many, from adding unparalleled freshness and flavor to your meals to nurturing a plant from seedling to harvest.
As you continue your herb gardening adventure, share your successes, challenges, and the delicious recipes you create using your homegrown basil. Let’s keep this vibrant community of gardeners growing and thriving!
So, are you ready to take your basil game to the next level? What other herbs are you considering adding to your garden?
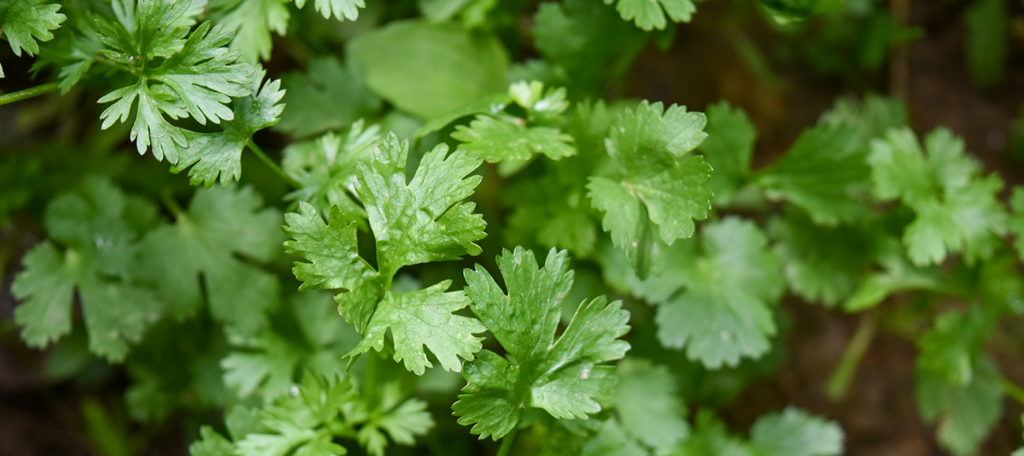
Cultivating Cilantro Year-Round in Sacramento’s Zone 9b
Today, let’s talk about a culinary favorite that’s claimed a particular spot in my herb garden—cilantro!
This versatile herb is an integral ingredient in many cuisines worldwide. If you’re as much of a cilantro fan as I am, and you’re looking to grow and harvest it year-round in Sacramento’s Zone 9b, you’re in the right place!
Cilantro: A Culinary Star in Your Backyard
Cilantro, or Coriandrum sativum, is a unique herb offering two distinct flavors from the same plant.
The leaves, known as cilantro, have a robust, citrusy flavor. The seeds, known as coriander, are aromatic and sweet. Cilantro brings fresh flavor to any dish, from spicy salsa to fragrant curries.
Planting Your Cilantro: Sun, Soil, and Spot
When it comes to planting cilantro, here are a few key points to remember:
- Sunlight: Cilantro likes full sun to partial shade. In the scorching Sacramento summer, it appreciates some afternoon shade.
- Soil: Like most herbs, cilantro thrives in well-draining soil. It prefers a neutral pH and doesn’t require overly rich soil.
- Spot: Choose a location in your garden where you can sow cilantro successively, as it tends to bolt (flower and set seed) quickly, especially in warm weather.
Quenching Cilantro’s Thirst: Watering Wisely
Cilantro prefers soil that is consistently moist but not waterlogged.
Regular, even watering is ideal. In the heat of a Sacramento summer, it may require more frequent watering to keep the soil moist.
Continuous Cilantro: Succession Planting
Due to cilantro’s tendency to bolt quickly, successive planting is your best bet for a continuous supply.
Plant seeds every 2-3 weeks during the growing season. This will ensure you always have fresh cilantro, even when older plants start to bolt.
Harvesting Your Cilantro: The More You Cut, the More It Grows!
When it comes to harvesting cilantro, remember this: the more you cut, the more it grows!
You can start harvesting when the plant is about 6 inches tall. Clip off the outer leaves close to the stem and leave the inner part to continue growing.
A Flavor for All Seasons: Cilantro in Winter
While cilantro loves the cool spring and fall weather, it can be coaxed to grow even in winter.
Use a frost blanket or cold frame to protect your plants when temperatures dip below freezing.
By now, you might be thinking, “I can’t wait to sow my cilantro seeds!” And why wait? With these tips, you can start your cilantro-growing journey. From the joy of watching the first sprouts emerge to the satisfaction of harvesting fresh herbs, there’s something truly special about growing your cilantro.
I hope you feel equipped and inspired to grow this fantastic herb as we wrap up our cilantro chronicle. But before we part ways, let’s tackle a few common questions:
Q: My cilantro is bolting too quickly. What can I do?
A: Try growing slow-bolt varieties of cilantro, and remember to keep the plants well-watered, especially in hot weather.
Q: How can I use coriander seeds?
A: You can use coriander seeds in cooking, either whole or ground. Coriander seeds lend a warm, spicy flavor to various dishes, including stews, curries, and baked goods. You can also save some seeds to plant in the next growing season!
Cilantro in the Kitchen: A Flavor Fiesta
Growing your own cilantro isn’t just a gardening win—it’s a culinary adventure!
Here’s how to make the most of your cilantro harvest:
- Fresh is Best: Freshly harvested cilantro has the most vibrant flavor. Use it in salads, salsas, soups, or as a garnish.
- Cilantro Pesto: Swap basil for cilantro in your favorite pesto recipe for a refreshing twist.
- Cilantro Lime Rice: Brighten up plain rice with a handful of cut cilantro and a squeeze of lime juice.
- Coriander Spice: Let some of your cilantro plants bolt and harvest the seeds. Dry and grind them as a spice, or use whole seeds for pickling.
The Evergreen Satisfaction of Growing Cilantro
Growing cilantro in your backyard is like having a magic ingredient at your disposal that adds a fresh, zesty flavor to your meals.
From choosing the best spot in your garden, and providing the right amount of water, to succession planting and harvesting, each step brings you closer to the gratifying moment of adding your homegrown cilantro to your favorite dishes.
I hope this guide fuels your enthusiasm for growing cilantro in Sacramento’s Zone 9b. With some care and attention, you can enjoy a year-round supply of this beautiful herb. Why wait? Step into your garden and start sowing those seeds!
Before we wrap up, let’s answer one more question:
Q: My cilantro plants are getting yellow. What’s wrong?
A: Yellowing cilantro plants could indicate overwatering or nutrient deficiency. Check if your soil drains well and consider a balanced, organic fertilizer.
Remember, every garden adventure comes with its own set of challenges. But with each hardship comes an opportunity to learn and grow like your cilantro. Embrace the journey and savor the rewards.
Cultivating Curly Parsley Year-Round in Sacramento’s Zone 9b
Hello, green thumbs and foodies!
As a gardening enthusiast and an avid cook, I’ve found a delightful partner in my curly parsley. This humble herb has made a grand entrance into my kitchen, offering subtle flavor and a beautiful garnish to my culinary creations.
If you’re here to learn about cultivating and harvesting this gem year-round in Sacramento’s Zone 9b, let’s embark on this verdant journey together!
Curly Parsley: The Unsung Hero in Your Herb Garden
Curly parsley (Petroselinum crispum) is a lovely herb recognized by its lush, green, and—yes, you guessed it—curly leaves!
Though it’s often sidelined as a simple garnish, this herb is a culinary powerhouse, bringing a fresh, crisp flavor to sauces, soups, and salads.
Curly Parsley’s Ideal Home: Location and Sunlight
Choosing the perfect spot for your curly parsley is the first step to a thriving herb garden. Here are a few tips:
1. Sunlight: Curly parsley thrives in full sun to partial shade. It appreciates a bit of respite from the intense Sacramento summer afternoon sun. Hence, a location with morning sun and afternoon shade is perfect.
2. Soil: Curly parsley prefers rich, well-draining soil. A loamy soil rich in organic matter will ensure your parsley flourishes.
Curly Parsley’s Quenching Quest: Watering Requirements
Like many herbs, curly parsley likes soil that is consistently moist but not waterlogged.
Aim to water your parsley when the top inch of the soil feels dry. In the heat of our Sacramento summers, you may need to water your parsley every other day.
Propagating Parsley: Keeping the Green Going
Curly parsley can be propagated from seeds or cuttings. For cuttings:
- Select a healthy stem about 4 inches long.
- Remove the lower leaves, leaving a few at the top.
- Submerge the cut end in water.
- After a few weeks, roots should appear, signaling it’s ready to plant!
Harvesting Year-Round: The Curly Parsley Dance
One of the joys of growing curly parsley is the ability to harvest year-round.
When harvesting, clip from the outer portions of the plant, which allows the center to continue growing. You can begin to gather when the plant is roughly 6 inches tall.
Though parsley is biennial, with proper care, it can grace your garden throughout the year in Sacramento’s Zone 9b. During the cooler months, a layer of mulch or a row cover can offer protection against frost.
As we conclude this curly parsley adventure, I hope you are inspired to try growing this marvelous herb. There’s a simple joy in adding your homegrown herbs to meals, not to mention the rewarding process of tending to your garden.
Before we sign off, let’s address a few curly parsley queries:
Q: My curly parsley is flowering. What should I do?
A: When your parsley flowers, it’s focusing energy on producing seeds, not leaves. You can delay this by pinching off the flowers as soon as they appear.
Q: Can I grow curly parsley indoors?
A: Absolutely! Ensure your curly parsley receives at least 6 hours of sun and make sure to keep the soil moist but not waterlogged.
Q: My parsley’s leaves are turning yellow. What could be the issue?
A: Yellowing leaves can indicate overwatering or poor drainage. Ensure your parsley’s soil is well-draining and adjust your watering schedule as needed.
Make the Most of Your Curly Parsley in the Kitchen
Not only is curly parsley an attractive addition to your garden, but it’s also a versatile ingredient in the kitchen.
From brightening a dish with its fresh, crisp flavor to adding a decorative touch as a garnish, curly parsley is a delight to cook with.
Here is how to get the very most out of your homegrown parsley:
- Fresh is Best: Use your freshly harvested parsley as soon as possible for the brightest flavor. But don’t worry if you can’t use it immediately; it will stay in the refrigerator for about a week.
- Freeze for Later: You can freeze your parsley for future use. Cut it up, put it in an ice cube tray, cover with water, and freeze. These handy parsley cubes can be added directly to soups and stews.
- Drying: Although curly parsley is usually fresh, it can also be dried for extended storage. Hang bunches of parsley in a warm, well-ventilated area until completely dry, then crumble the leaves and store them in an airtight container.
Bringing it All Together: Enjoying the Fruits (or Herbs) of Your Labor
Cultivating your curly parsley in Sacramento’s Zone 9b is a rewarding endeavor that adds beauty to your garden and flavor to your table.
From choosing the perfect spot to watering, propagating, and harvesting, each step brings you closer to that satisfying moment of sprinkling your homegrown parsley onto your favorite dishes.
As we conclude our parsley parade, I hope this guide encourages you to embark on your curly parsley journey. Fresh, homegrown herbs taste unmatched, and their vibrant presence in your garden is a joy to behold. So, why not step into your garden, get your hands dirty, and start growing?
Before we bid adieu, let’s tackle one last question:
Q: I’m seeing small, black insects on my parsley. What are these little insects, and how do I go about getting rid of them?
A: They could be aphids, a common garden pest. Try blasting them off with a strong stream of filtered water, or use an insecticidal soap for a severe infestation. I also like to use natural neem oil.
Remember, every garden adventure comes with its unique set of challenges and triumphs. Embrace them all, and you’ll be rewarded with a thriving garden and a bounty of fresh, flavorful herbs.
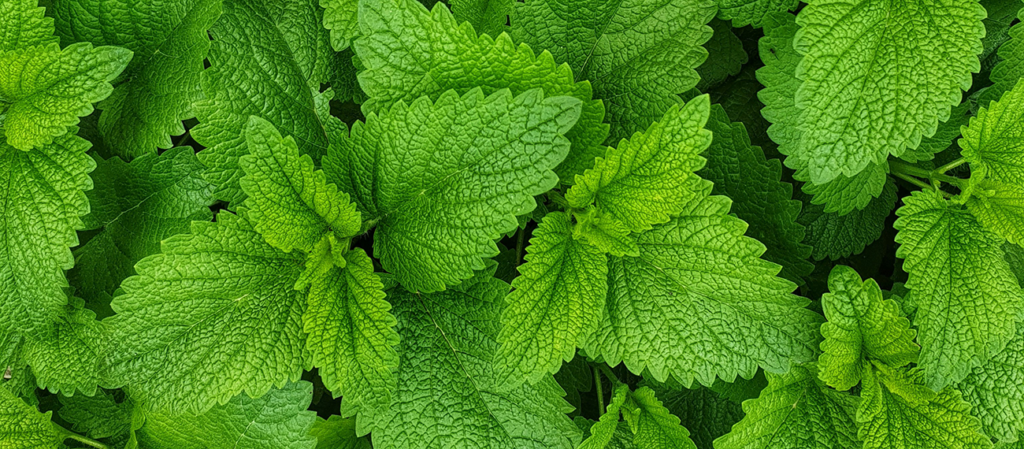
Mint Magic: Growing and Harvesting Sweet Mint in Sacramento’s Zone 9b
As an avid gardener with love for fresh, healthy smoothies, I’ve found that there’s nothing quite like the addition of homegrown sweet mint.
This aromatic herb enhances the flavor of my drinks, and the satisfaction of plucking it straight from my backyard herb garden is unmatchable. If you want to keep your supply of sweet mint going year-round in Sacramento’s Zone 9b, you’re in the right place!
Sweet Mint: A Quick Introduction
Sweet mint (Mentha spicata) is a delightful herb with a refreshing, slightly sweet flavor.
It is prized for its culinary uses, particularly in beverages, desserts, and salads. In our garden, it serves as a fresh addition to our daily fruit smoothies.
Settling Down: Ideal Location and Sunlight
Sweet mint is a hardy, versatile plant, but it does have its preferences.
Finding the best location for mint in your garden is the first step towards ensuring its lush growth. Here’s what you need to consider:
1. Sunlight: Sweet mint loves the sun, but it also appreciates a bit of shade, particularly during Sacramento’s scorching summers. Aim for a location that offers full sun to partial shade, about 4-6 hours of sunlight each day.
2. Soil: Sweet mint isn’t too picky about the soil. It grows well in various soil types as long as the soil is well-draining. A pH that is between 6.0 and 7.0 is ideal.
Quenching Thirst: Watering Your Sweet Mint
Sweet mint enjoys moist soil but dislikes being waterlogged.
Aim to keep the soil consistently and slightly damp but not soaking wet. During our hot summers, you might need to water your mint every 2-3 days. However, always check the soil before watering – if the top inch is dry, it’s time for a drink.
Harvesting Mint: A Year-Round Bounty
Harvesting sweet mint is a joy.
Its refreshing scent fills the air, promising a delightful addition to your smoothies. To harvest, snip off the top leaves and stems. You can start gathering when the plant reaches about 6 inches in height.
To ensure a year-round supply of sweet mint, keep the following in mind:
- Regular Harvesting: Regularly harvesting mint encourages bushier growth. The more you gather, the more it grows!
- Winter Care: Although mint is a perennial plant, it may die back during colder months. However, don’t despair! In Zone 9b, it’s likely to regrow from the roots in spring.
Tips for a Continual Harvest
For a continually bountiful harvest, consider propagation.
Sweet mint is incredibly easy to propagate via stem cuttings. Take a 4-5 inch long cutting, place it in water, and watch as roots start to form in a week or two.
It’s also worth noting that mint can become invasive. Consider growing it in containers or start using root barriers to keep it from taking over your garden.
Wrapping Up: The Joys of Homegrown Mint
There’s an undeniable charm in having a supply of fresh, sweet mint right in your backyard.
The very vibrant green leaves add a pop of color to your garden and enhance your culinary creations. And let’s remember the joy of stepping into your gorgeous garden and being greeted by the beautiful and refreshing smells of mint.
As we wrap up, let’s tackle a few common questions.
Q: My mint plant seems to be spreading rapidly. How can I control it?
A: Mint is known to be quite invasive. To control its spread, consider growing mint in containers or raised beds. If it’s already in the ground, you could install root barriers to prevent it from taking over your garden.
Q: When should I avoid harvesting mint?
A: Avoid harvesting mint when the plant is about to flower, as the leaves can become bitter. Instead, pinch off the budding flowers to encourage more leaf growth.
Q: My mint leaves seem to be turning yellow. What’s wrong?
A: Yellowing leaves could be a sign of overwatering. While mint likes moist soil, ensuring the soil isn’t waterlogged is essential. Also, check for proper drainage to avoid soggy soil conditions.
Q: Can I grow sweet mint indoors?
A: Absolutely! Mint grows quite well indoors. Just ensure it gets at least 4-6 hours of sunlight, preferably from a south-facing window.
Growing sweet mint at home is a rewarding experience. Its fresh, sweet flavor and enticing aroma make it a delightful addition to any garden and kitchen. If you start following these tips, you can enjoy a beautiful year-round supply of this refreshing herb from your backyard.
How else can you incorporate fresh herbs into your daily meals? How might your culinary creations transform with a steady supply of homegrown herbs?
Enjoy your mint and bon appétit!
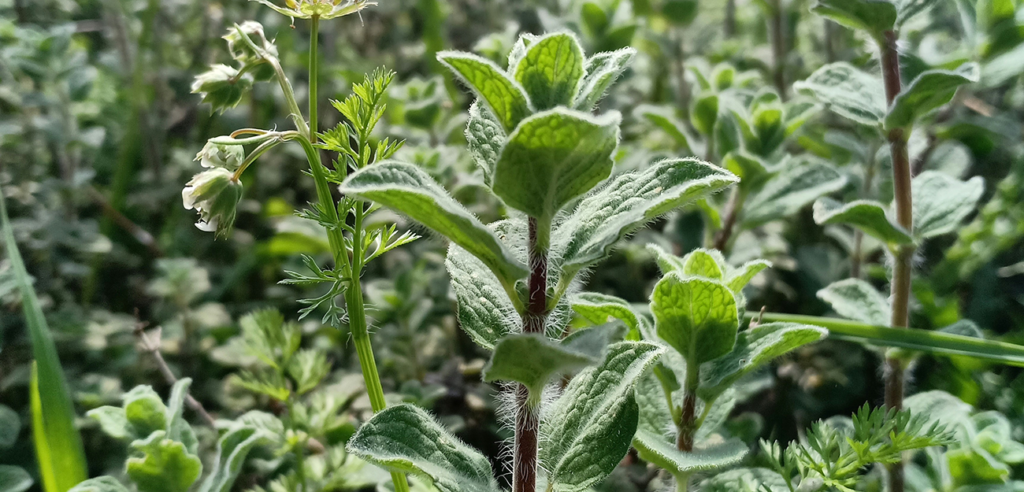
Growing & Harvesting Greek and Italian Oregano in Sacramento’s Zone 9b
As a culinary enthusiast, I have recently embarked on an exciting new adventure: starting an herb garden.
The journey has been enriching, especially as it led to the planting of two-star residents: Greek and Italian Oregano. Today, I’m thrilled to share my learnings about how to keep these aromatic herbs thriving in Sacramento’s Zone 9b and how they continually replenish my stock of cooking herbs.
Embracing the Mediterranean Roots
Greek Oregano (Origanum vulgare subsp. hirtum) and Italian Oregano (Origanum x majoricum) are both Mediterranean natives.
They love the sun and are drought-resistant, making them perfect for Sacramento’s Zone 9b, where summers can be blazing hot and winters mild.
The Sun, The Earth, and Our Herbs
In our sunny Sacramento, place your Greek and Italian Oregano in a location that gets full sun for at least 6-8 hours daily.
They thrive best in well-draining soil, which is crucial to prevent root rot. Regarding soil pH, aim for a neutral to slightly alkaline range, between 6.0 and 8.0.
A Thirst for Balance
While drought-resistant, both varieties still need watering, especially during our intense summers.
Aim to water them once a week or the the soil on the top inch feels dry. Remember, it’s better to be underwatering than overwatering.
Nourishment for Growth
Fertilization is only sometimes necessary for these hardy herbs.
A light, balanced fertilizer that you give during the growing season should do the trick if you desire a growth boost. However, avoid over-fertilizing as it may lead to less flavorful leaves.
Understanding Greek vs. Italian Oregano
While both are oregano, they are not quite the same.
Greek Oregano tends to have a more potent flavor and is often considered the true oregano for culinary use. It has an earthy, robust taste, with a slightly bitter and peppery undertone.
On the other hand, Italian Oregano is a milder, sweeter variety. It’s a cross between the more potent Greek Oregano and sweet Majoram, which mellows its flavor. It also has a slightly floral note, making it a versatile herb in various dishes.
Propagation: The Cycle of Life
One of the greatest parts of gardening is propagation.
With oregano, the process is relatively straightforward:
- Cutting: Take a 4-5 inch cutting from a super healthy, non-flowering stem in the late spring or early summer. Remove the leaves from the bottom two-thirds.
- Rooting: Place the little cutting in a glass of water, ensuring that the leafless part is submerged. Within 2-3 weeks, roots should start to form.
- Planting: Once the roots are about an inch long, it’s time to plant the cutting in a pot with well-draining soil.
Trimming for Continual Growth
To keep your oregano thriving throughout the year, regular trimming is essential.
Trimming will give you a constant supply of fresh herbs and encourage the plant to get bushier and more productive.
For Greek Oregano, a good rule of thumb is to cut back to about one-third of the plant’s height when it reaches 4-5 inches tall. For Italian Oregano, you can trim it back to about half of its height.
In Honor of Greek and Italian Heritage
Gardening, especially growing herbs, is a delightful journey.
The beautiful happiness of seeing your plants grow, the satisfaction of cooking with herbs from your own garden, and the wealth of knowledge gained along the way make it a worthwhile endeavor.
With Greek and Italian Oregano, you cultivate flavorful herbs and nurture hardy, resilient plants that can withstand our hot Sacramento summers.
And as we step into this beautiful dance of nature, let’s remember to be patient and attentive gardeners. Let’s watch for the signs our plants show us – when they’re thirsty, need a trim, or are ready for propagation.
In closing, I hope this guide helps you on your journey to cultivating Greek and Italian Oregano in Sacramento’s Zone 9b.
Now, let’s jump into a quick Q&A.
Q: My Oregano plant is flowering. What should I do?
A: When your oregano plant starts to flower, it’s a sign to start pruning. Cut the stems back to about a third of the plant’s height to promote more leaf growth and less flower production. Remember, the leaves are where the flavor is!
Q: I noticed some of the leaves turning yellow. What could be the issue?
A: Sometimes, yellowing leaves can be a sign of overwatering. Remember, these Mediterranean herbs like drier conditions. Always double-check the top inch of the soil before watering again.
Q: Can I grow these oregano varieties indoors?
A: Absolutely! Greek and Italian Oregano can be grown indoors, with at least 6 hours of sunlight. A south-facing window would be a great spot.
As we wrap up our journey with Greek and Italian Oregano, I invite you to explore more about herb gardening. What other herbs would you like to add to your garden? How might they complement the flavors of your Greek and Italian Oregano? How can you create a more sustainable, edible landscape right in your own backyard?


